Documentation Index
Fetch the complete documentation index at: https://docs.scalev.com/llms.txt
Use this file to discover all available pages before exploring further.
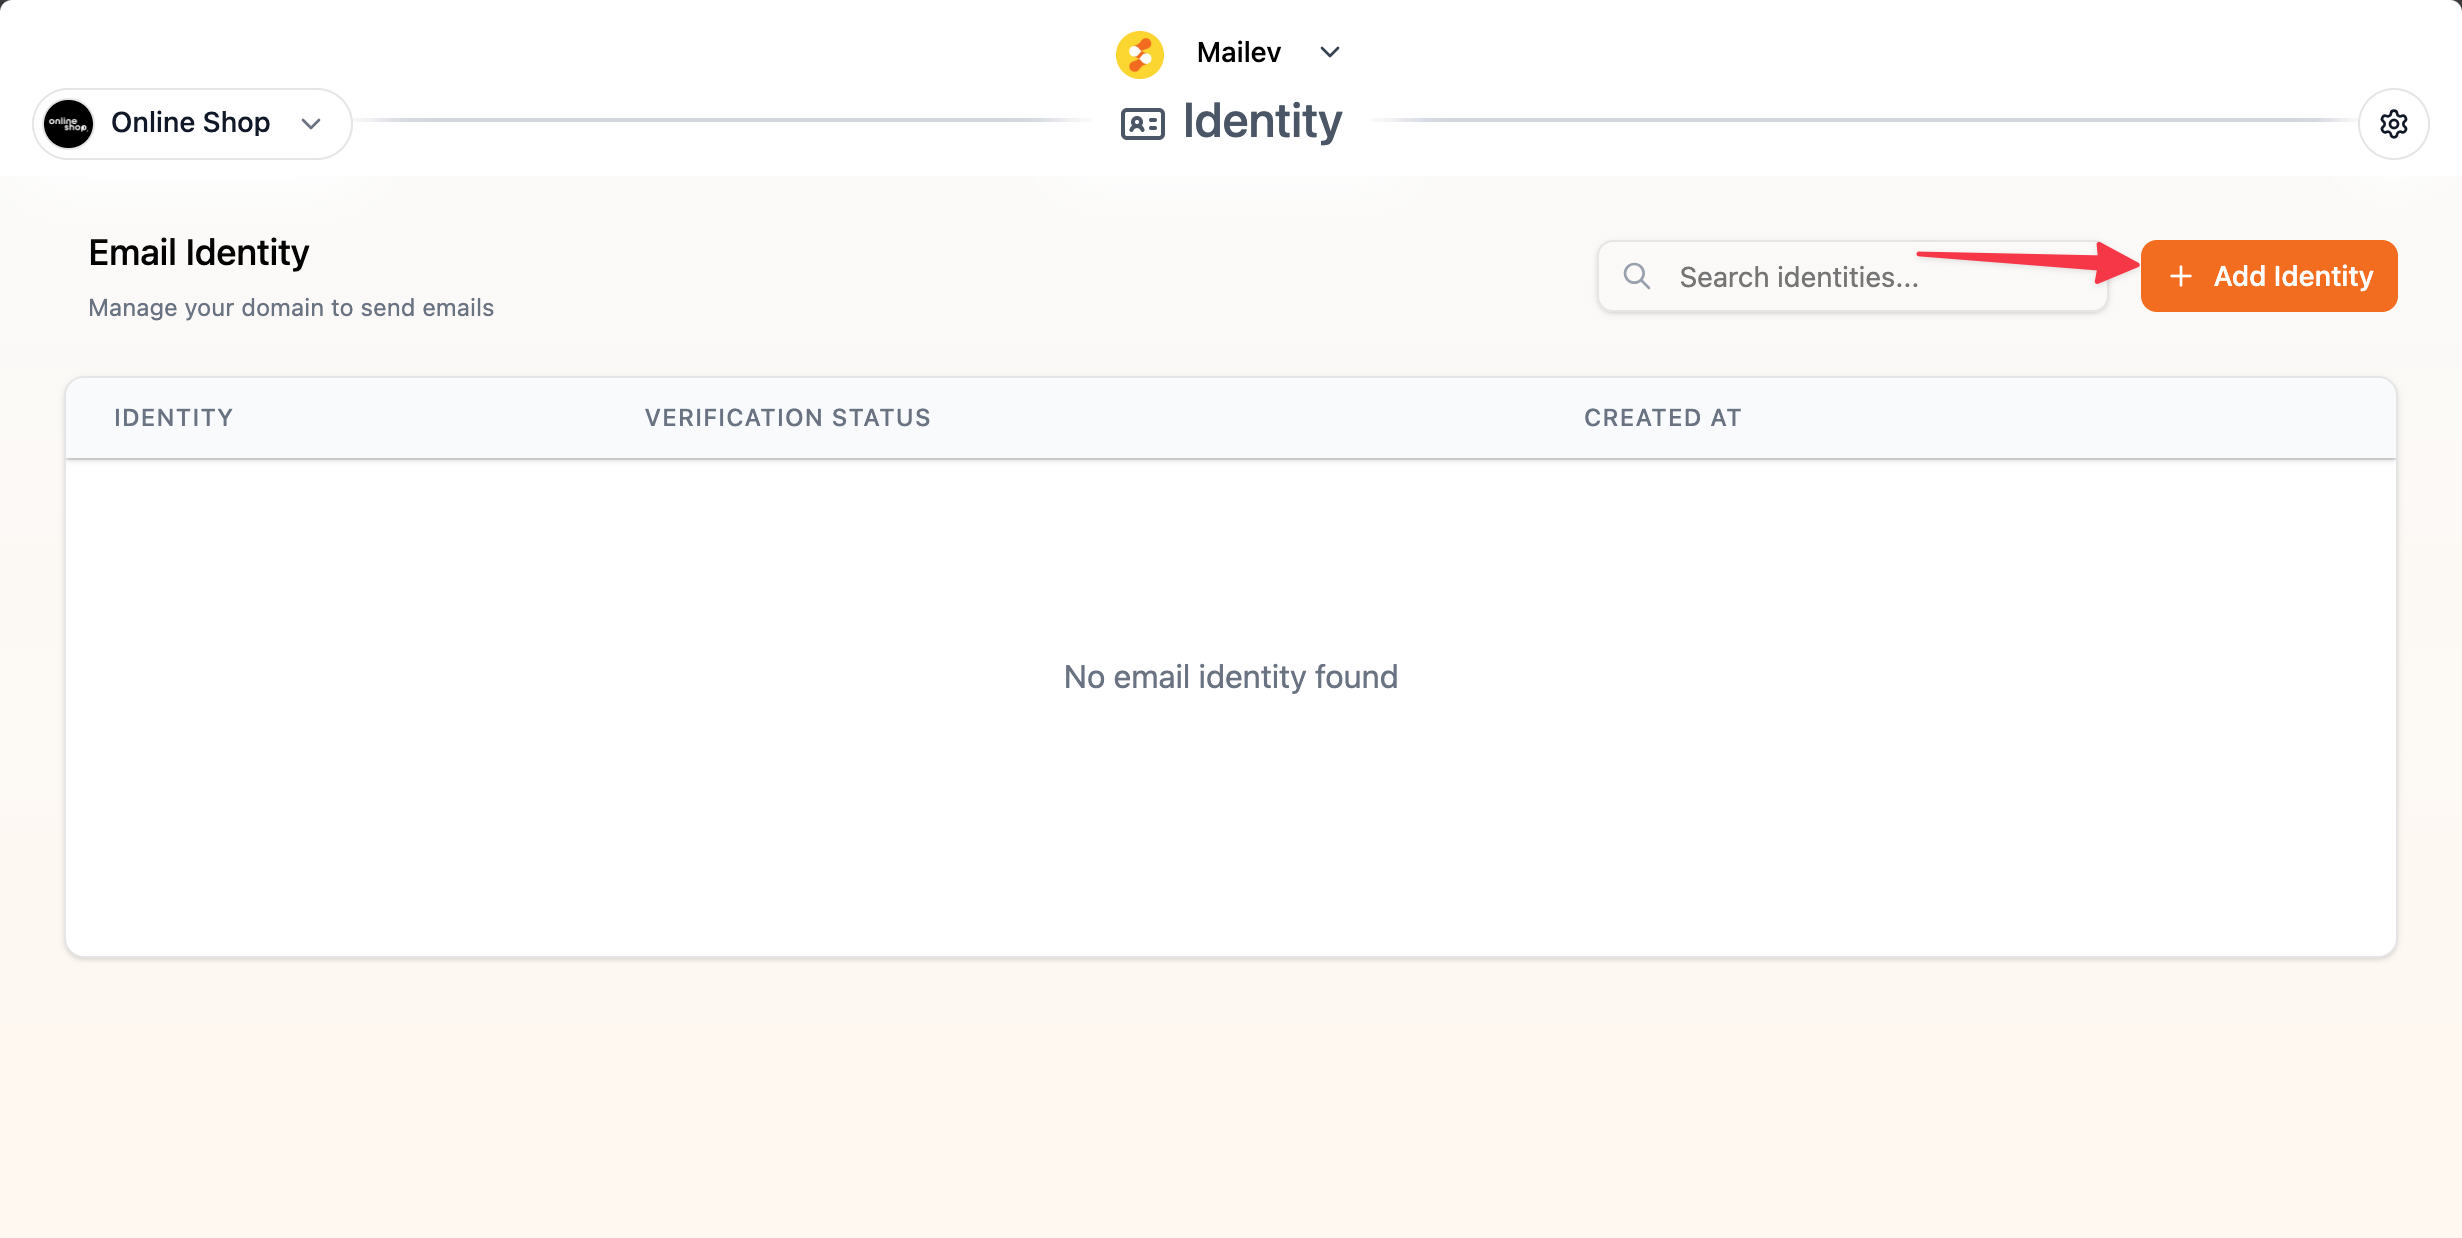
Log in to https://app.mailev.co/login first.
Then click Add Identity.
 Enter an Identity Name (this can be anything).
Select the domain to use — the domains listed in Mailev are the custom domains you’ve already verified in Scalev.
Enter an Identity Name (this can be anything).
Select the domain to use — the domains listed in Mailev are the custom domains you’ve already verified in Scalev.
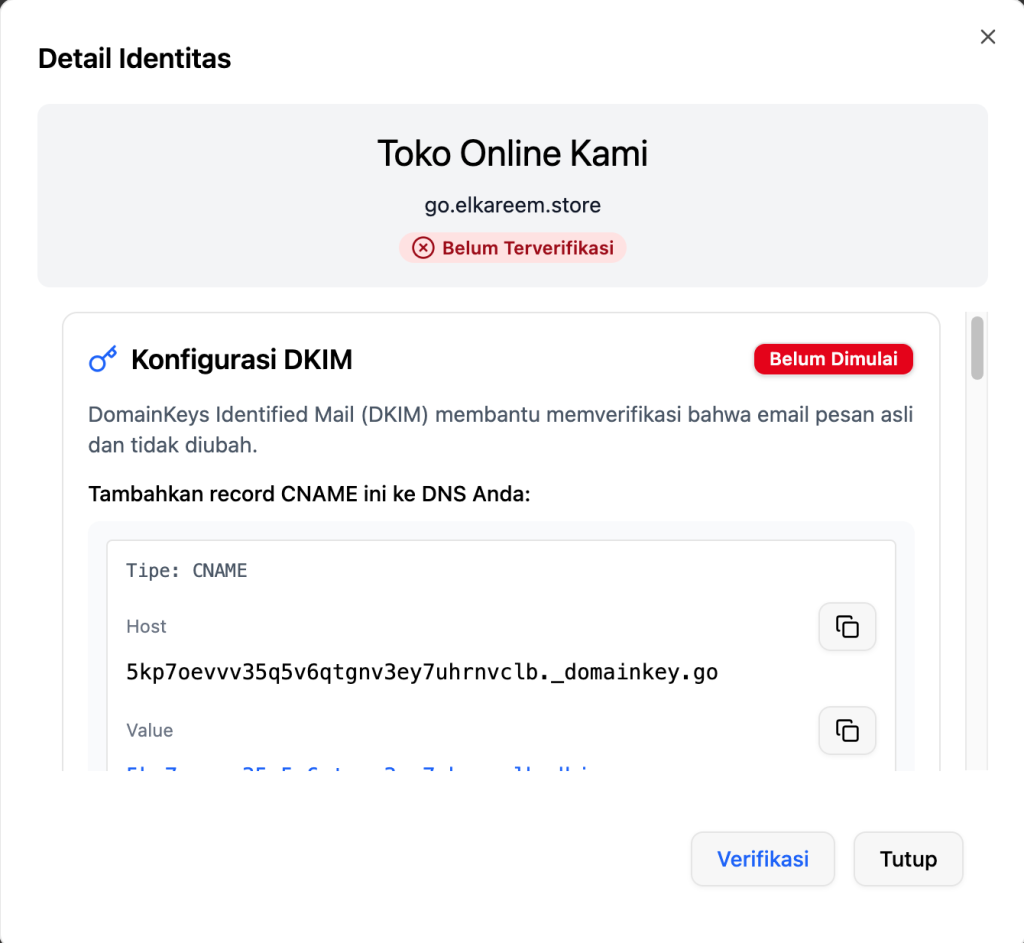
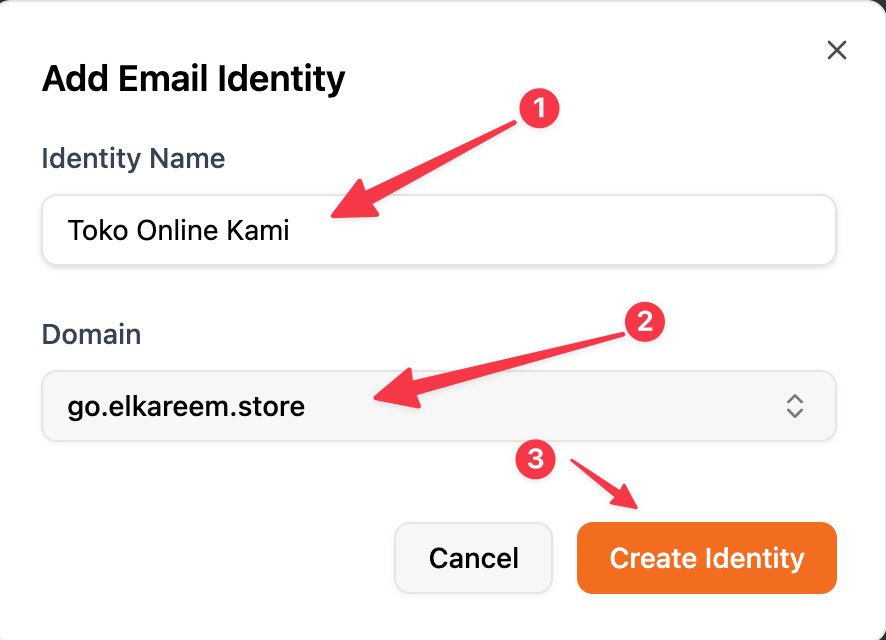 Then click Create Identity — 5 DNS records will appear:
- 3 DNS Type CNAME
- 2 DNS Type TXT
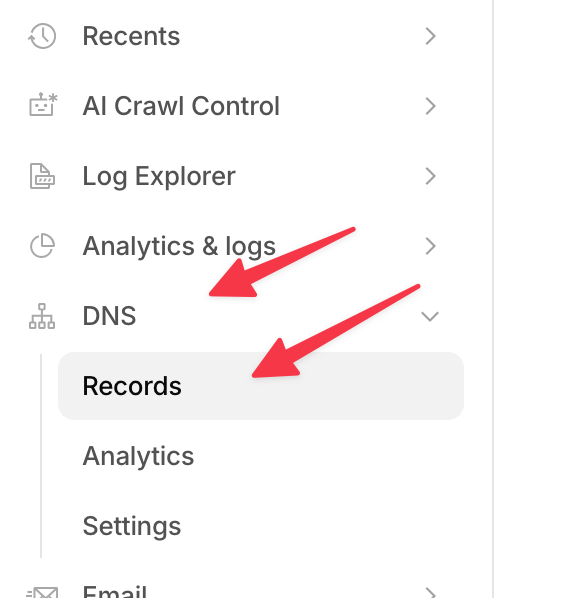
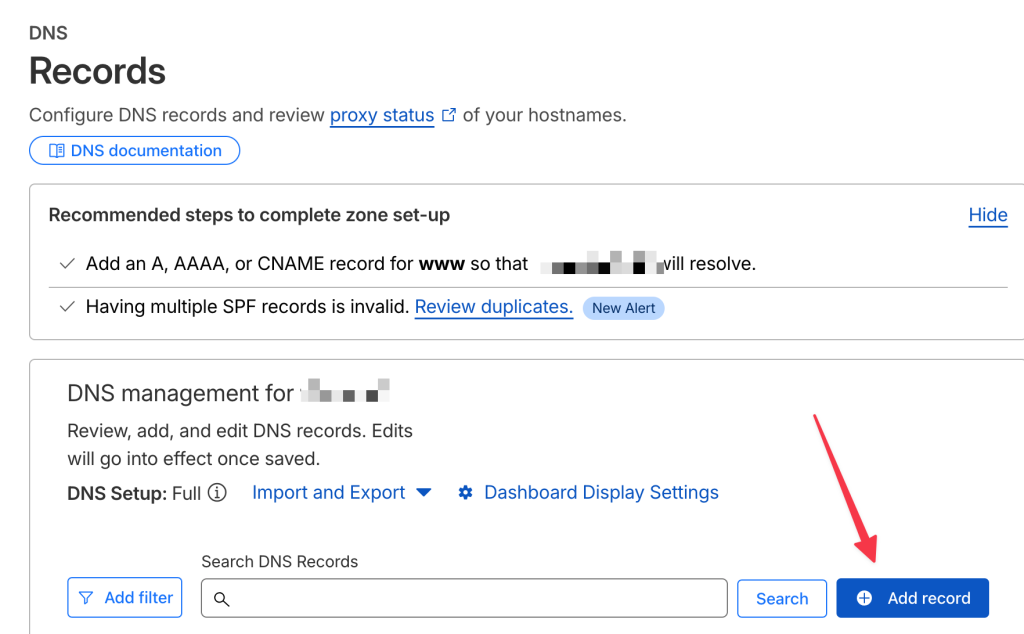
Add the DNS records to Cloudflare. Go to your Cloudflare dashboard → Click the domain name → Click the DNS menu on the left & click Records.
 Click Add Record.
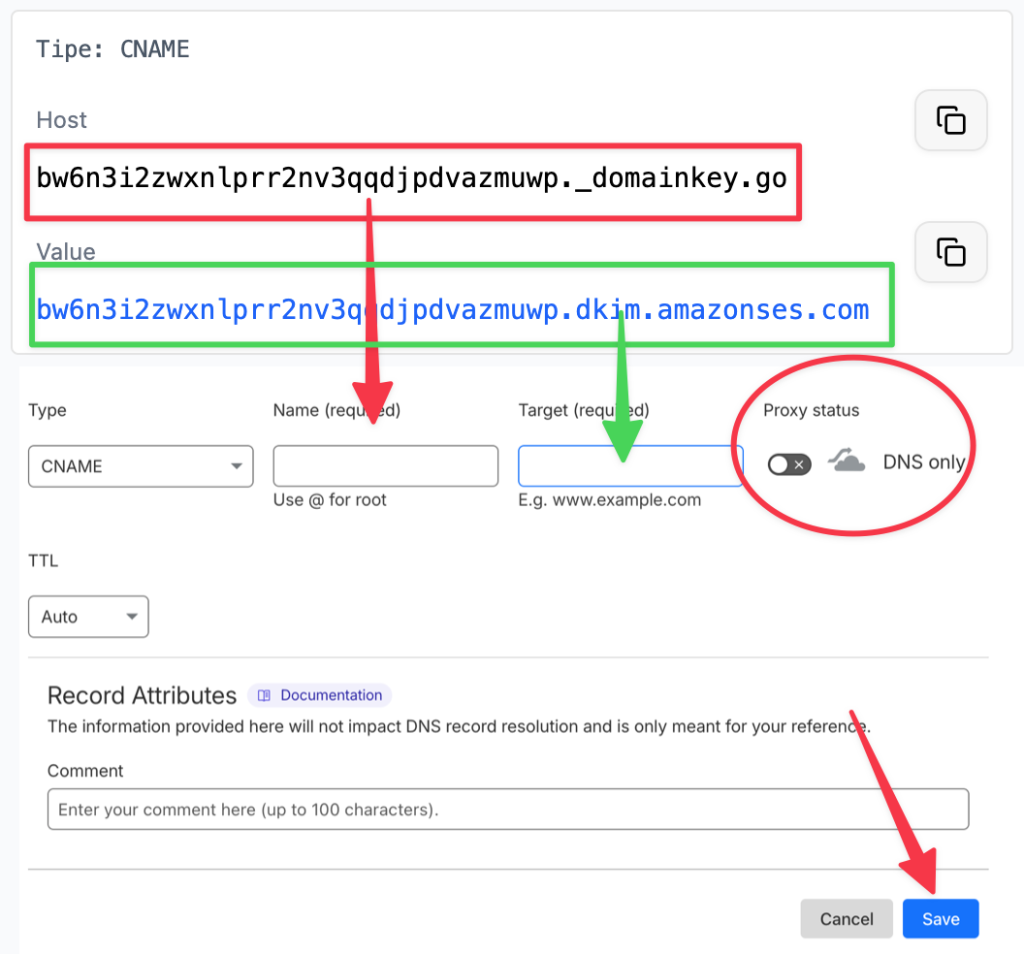
Add the first CNAME DNS record, with these settings:
- Host goes into Name
- Value goes into Target
- Proxy Status set to DNS Only
- Save

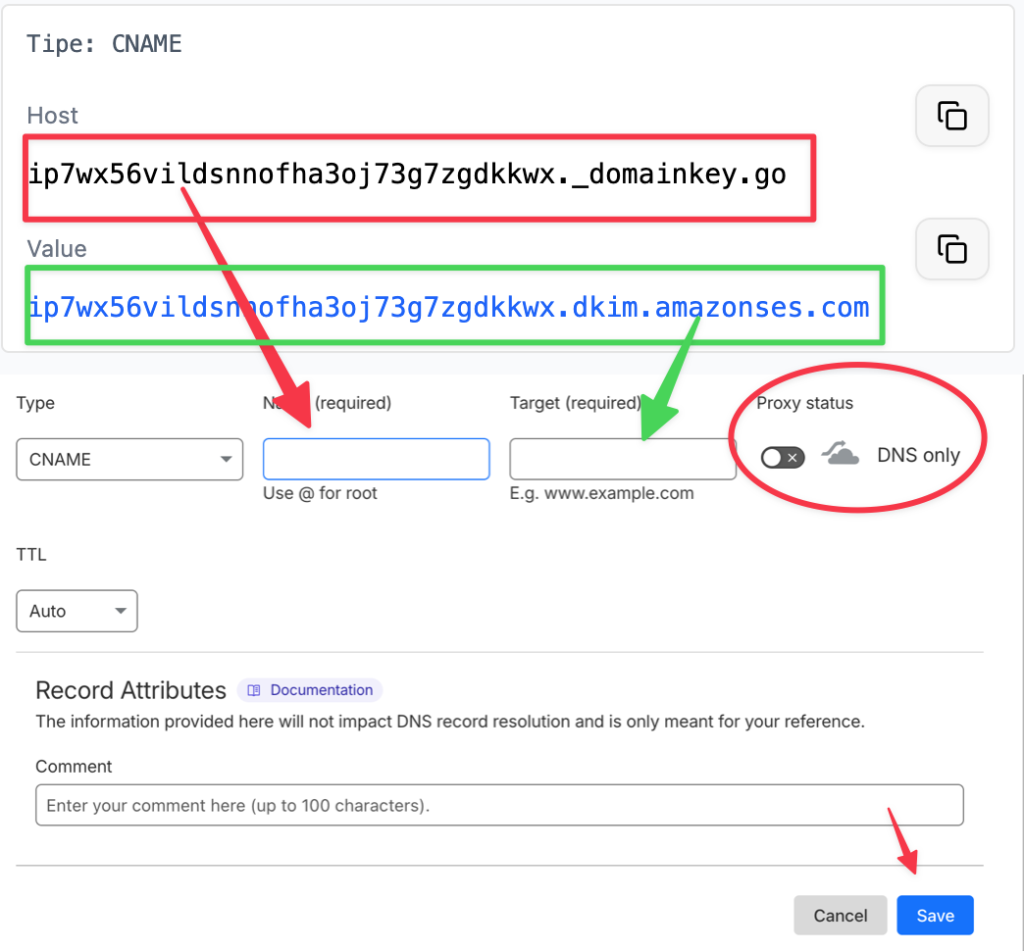
Click Add Record again. Then add the second CNAME DNS record, with these settings:
- Host goes into Name
- Value goes into Target
- Proxy Status set to DNS Only
- Save
Click Add Record again. Then add the third CNAME DNS record, with these settings:
- Host goes into Name
- Value goes into Target
- Proxy Status set to DNS Only
- Save
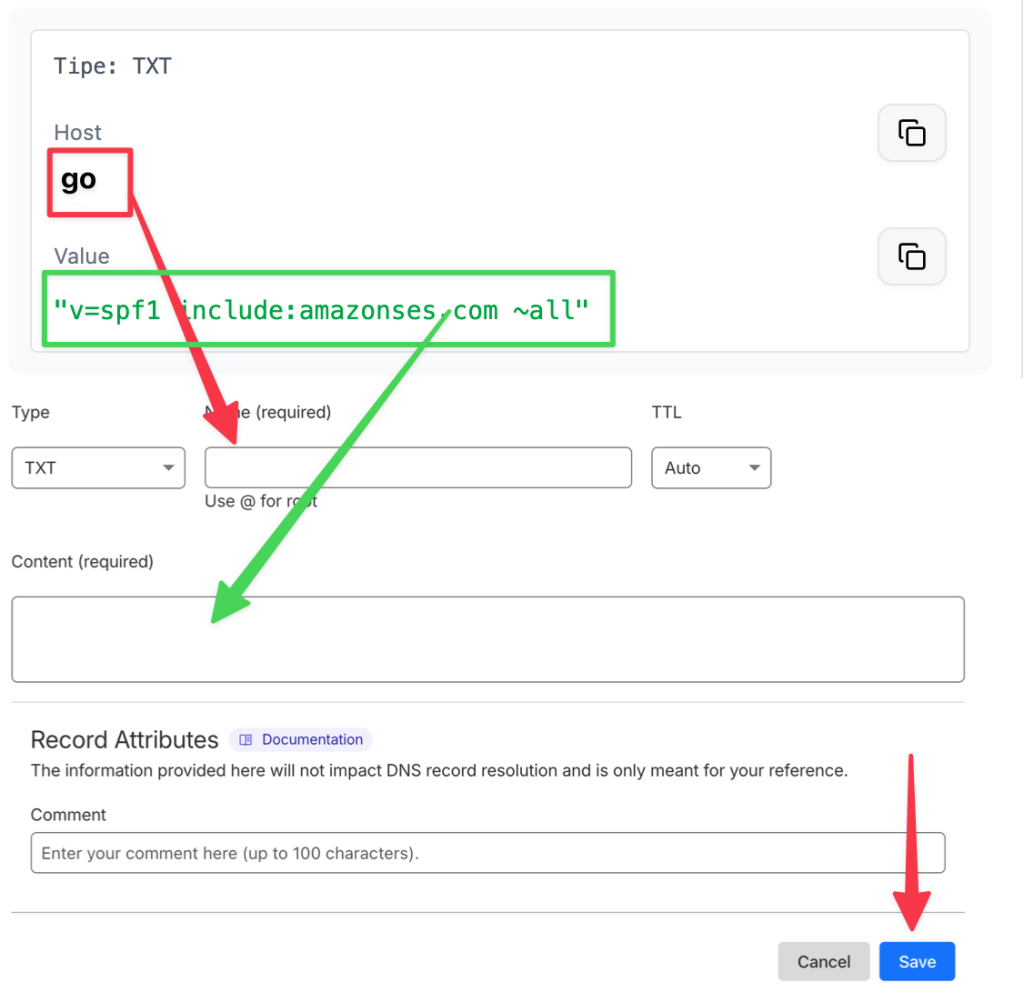
Click Add Record again. Then add the first TXT DNS record, with these settings:
- Host goes into Name
- Value goes into Content
- Save
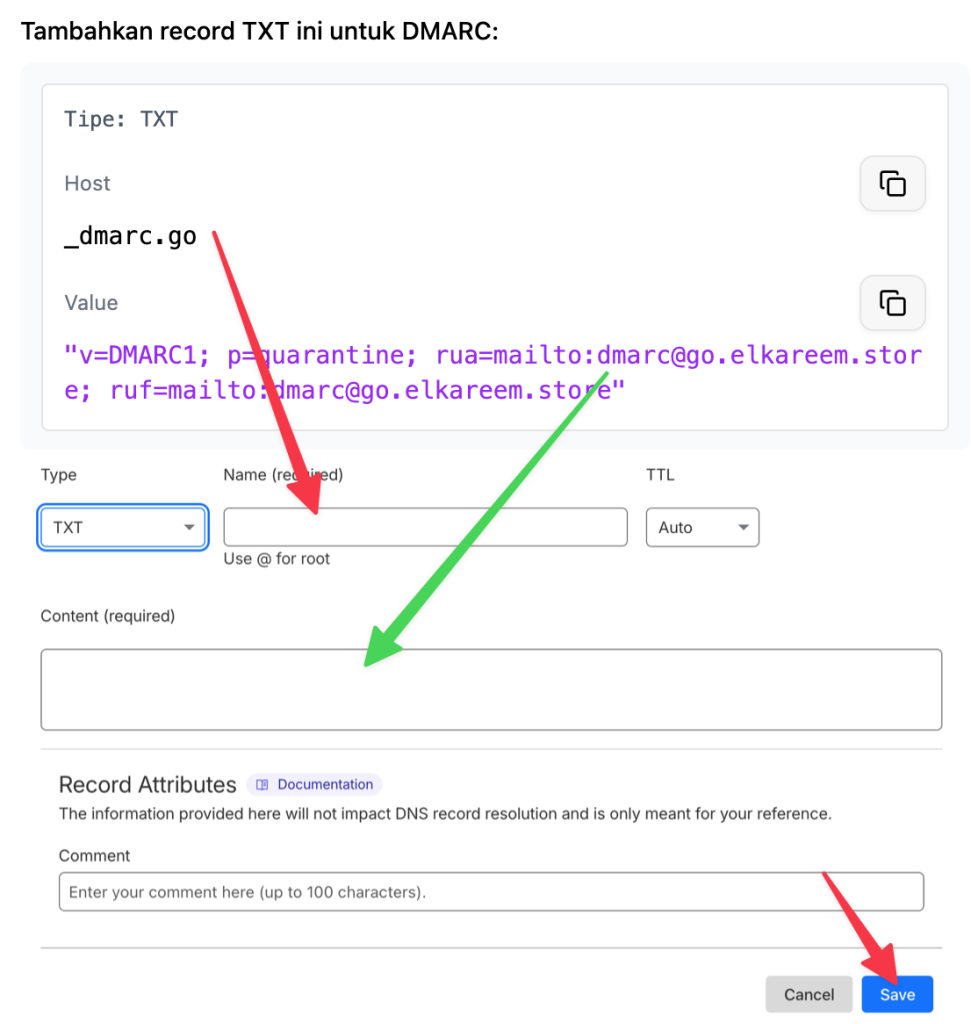
Click Add Record again. Then add the second TXT DNS record, with these settings:
- Host goes into Name
- Value goes into Content
- Save
Once all five DNS records are added, click Verify.
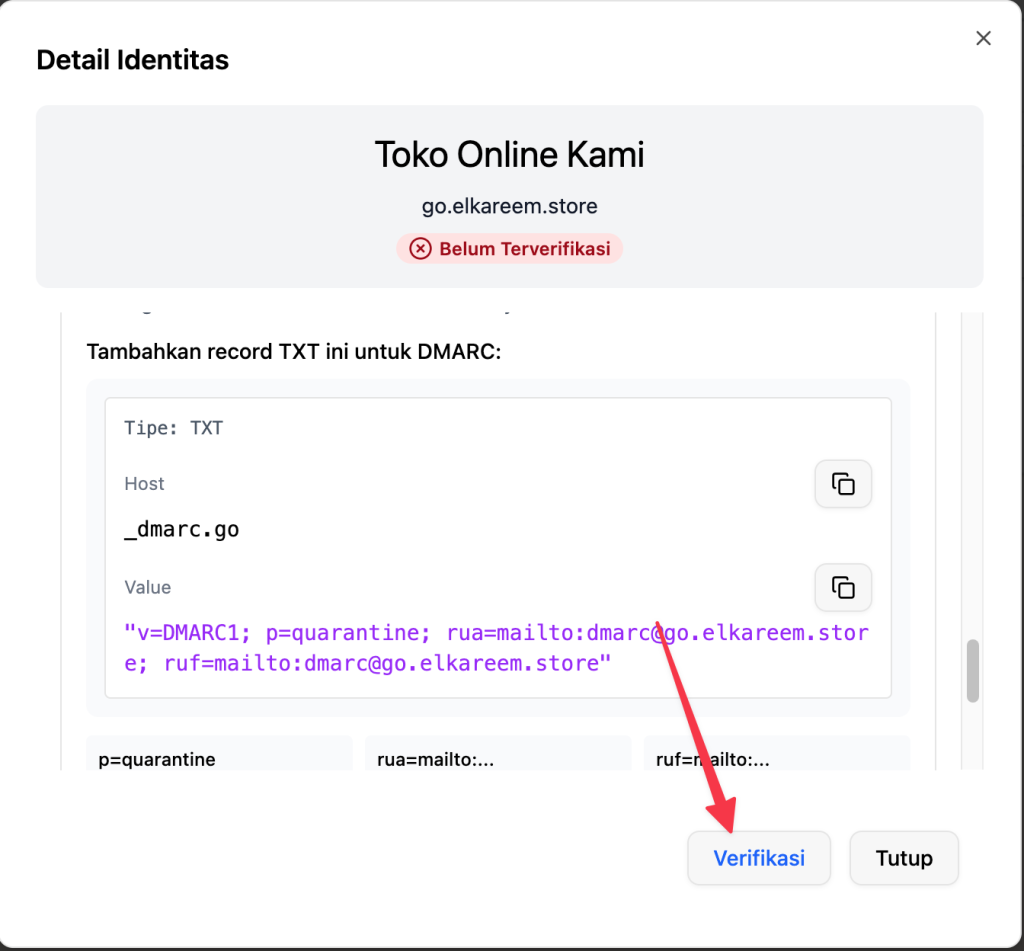 If successful, your domain status in Mailev will become verified — meaning you’re ready to use that email domain to send broadcasts in Mailev.
